在 Python 中使用 cv2 进行嗜睡检测
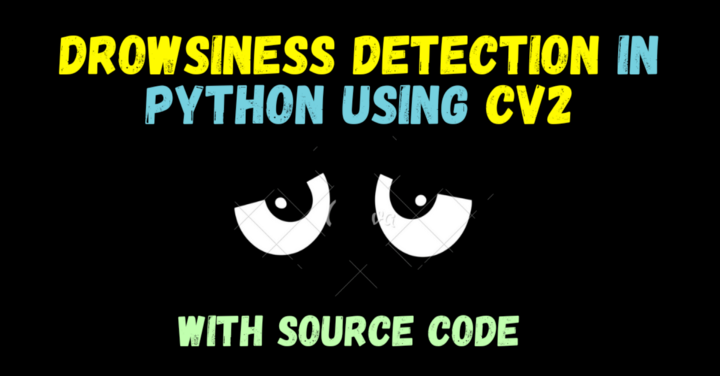
大家好,在这个博客中,我们将构建一个嗜睡检测应用程序,它将检测视频中的人是否变得昏昏欲睡。
这是一个非常有趣且简单的项目,代码甚至不到 80 行,让我们开始吧
看看最终输出
注意——你不会在这里听到警报声,因为它是 GIF,你可以在博客上查看视频:

嗜睡检测代码
from imutils import face_utils
import dlib
import cv2
from pygame import mixer
thres = 6
mixer.init()
sound = mixer.Sound('alarm.wav')
dlist = []
detector = dlib.get_frontal_face_detector()
predictor = dlib.shape_predictor("shape_predictor_68_face_landmarks.dat")
cap = cv2.VideoCapture(0)
def dist(a,b):
x1,y1 = a
x2,y2 = b
return ((x1-x2)**2 + (y1-y2)**2)**0.5
while True:
# Getting out image by webcam
_, image = cap.read()
# Converting the image to gray scale
gray = cv2.cvtColor(image, cv2.COLOR_BGR2GRAY)
# Get faces into webcam's image
rects = detector(gray, 0)
# For each detected face, find the landmark.
for (i, rect) in enumerate(rects):
# Make the prediction and transfom it to numpy array
shape = predictor(gray, rect)
shape = face_utils.shape_to_np(shape)
# Draw on our image, all the finded cordinate points (x,y)
for (x, y) in shape:
cv2.circle(image, (x, y), 2, (0, 255, 0), -1)
le_38 = shape[37]
le_39 = shape[38]
le_41 = shape[40]
le_42 = shape[41]
re_44 = shape[43]
re_45 = shape[44]
re_47 = shape[46]
re_48 = shape[47] dlist.append((dist(le_38,le_42)+dist(le_39,le_41)+dist(re_44,re_48)+dist(re_45,re_47))/4<thres)
if len(dlist)>10:dlist.pop(0)
# Drowsiness detected
if sum(dlist)>=4:
try:
sound.play()
except:
pass
else:
try:
sound.stop()
except:
pass
# Show the image
cv2.imshow("Output", image)
if cv2.waitKey(5) & 0xFF == 27:
break
cv2.destroyAllWindows()
cap.release()
第 1-4 行:导入所需的库。
第 6 行:设置阈值(将在前面的代码中看到)。
第 8-9 行:使用 pygame 模块创建警报声音,以便在应用程序中进一步使用它。
第 11 行:我们将在前面使用的空列表。
第 13 行:使用 dlib 人脸检测器。
第 14 行:使用 dlib 地标检测器检测眼点。
第 16 行:初始化 cap 对象以便稍后使用 Webcam。
第 18-21 行:一个简单的距离函数,用于计算两个坐标之间的距离。
第 25 行:从网络摄像头读取图像。
第 27 行:将它们转换为灰度。
第 30 行:检测人脸。
第 33 行:开始遍历这些面部。
第 35-36 行:获取 68 个面部特征并将它们转换为 NumPy 数组。
第 39–40 行:画出所有的地标。
第 42-50 行:提取所需的眼睛标志。
对于左眼,我们将提取38、39、42 和 41。
对于右眼,我们将提取44、45、48 和 47。
在阅读进一步的步骤之前,请阅读下面的算法。

第 54 行:该行负责保持 dlist=10 的大小。
删除是从前面完成的,添加是在最后完成的。
这就像一个队列系统。
第 57–66 行:当 dlist 中至少有 4 个 True 时播放警报。当它们小于 4 时停止。第 69 行:显示图像。
第 71–72 行:当用户按下ESC键时停止应用程序。
第 74–75 行:关闭所有 cv2 窗口并释放网络摄像头。
用于检测嗜睡的算法:
· 求 38-42、39-41、44-48 和 45-47 地标之间的距离,并求这 4 个地标的平均值。
· 如果这个平均值大于我们最初定义的 thres,则在我们的 dlist 中追加/添加一个 True。
· 如果我们的 dlist 包含 4 个或更多 Trues,则意味着在连续 4 帧中,检测到睡意,因此播放警报。
· 我们保留了大于等于4,因为如果我们不这样做,即使我们眨眼,我们的程序也会发出警报,这是误报。
输出:

注意——你不会在这里听到警报声,因为它是 GIF,你可以在博客上查看视频
执行嗜睡检测的其他想法:第一种方法是我们在上面执行的方法。第二种方法是在人脸图像上训练神经网络。第三种方法是在眼睛图像上训练神经网络。
这就是你可以使用 cv2和 dlib 在 python 中执行嗜睡检测的方法。
原文标题:在 Python 中使用 cv2 进行嗜睡检测
-
在 Python 中使用 OpenCV 进行图像处理
2022-11-21 -
使用 OpenCV 和 Python 在直播中模糊人脸
2022-11-14 -
使用 OPENCV Python 进行颜色检测和选择
2022-08-16 -
Python 3 显示图像的方法
2022-08-15 -
用python实现网表分模块统计面积
2022-07-04 -
使用Python进行面部识别
2022-05-12 -
Python中OpenCV的基础知识
2022-05-09 -
使用Python和docTR提取车辆识别号
2022-03-25 -
python的数字与字符串相互转换
2022-01-24 -
Python画矩阵关系图
2021-08-18 -
如何用Python从头开始构建VGG Net?
2021-08-05 -
QuecPython SDK正式开源
2021-07-19 -
如何用Python+OpenCV生成字幕?
2021-07-01 -
如何使用Python OpenCV混合图像?
2021-06-15 -
Python:什么是字典理解?
2021-06-15


